
You’ve just submitted a drawing of your die cut part design, and you’re feeling proud of yourself for a well-done job. Except, within a minute or so, your computer chimes with an email:
Hi [your name],
What am I looking at here?
xoxo, Your Flexible Material Converter
Instead of falling to your knees in despair, you take a second to ponder what was so confusing about your part drawing.
Each custom die cut part has a unique design, and Strouse has spent the past 30+ years helping transform product drawings into finished parts. We know that unclear, incomplete, or inaccurate drawings can cause unnecessary setbacks, so we wanted to answer the question: What do you need to include in a technical drawing?
If you’re currently working on or planning to create a product drawing, keep on reading to learn more about the types of specifications to include and their manufacturing importance.
Why Do I Need a Die Cut Drawing?
A die cut drawing is the primary point of reference for your part. It will specify product dimensions, tolerances, materials, and any other factors a converter needs to know to build your product accurately.
Imagine if your friend asked you to draw “the perfect dog” without additional context. You might opt to deliver a stick figure or realistic portrait, but there would be too many methods and types of dogs to match the image they’ve created in their head. Building “the perfect part” depends on your design specifications in the custom manufacturing industry. A converter will deliver a part that is accurate to the quality of your part drawing.

Measurements to Include in my Die Cut Part Drawing
The information in the part drawing should be expansive enough to allow your converter to re-draw your design with proper tooling dimensions. Your converter will likely make slight changes to your design to optimize it for the die cut tool maker, but it’ll be impossible if you haven’t gone into detailed measurements.
Above all else, your drawing should have product dimensions, part tolerances, and a frequency of measurement (if needed).
1. PRODUCT DIMENSIONS
Product dimensions are the most basic factor in part design—after all, how could your converter build a part without knowing its dimensions?
You’re probably wondering which numbers to include in your drawing, but because we work with so many unique parts, it would be challenging to list out particular dimensions to be included in every sketch. These are the factors our engineers consider when reviewing your initial drawing:
- Does this look like something we can create geometrically?
- Is it possible to create a tool for this size of a part? (i.e., you can’t make a tool that’s 60” wide)
- How small or complex are the features?
When it comes to part measurements, you should always indicate critical dimensions in your design. Also, if there are dimensions that must be exactly as listed, leave a note for your converter.
2. PART TOLERANCES
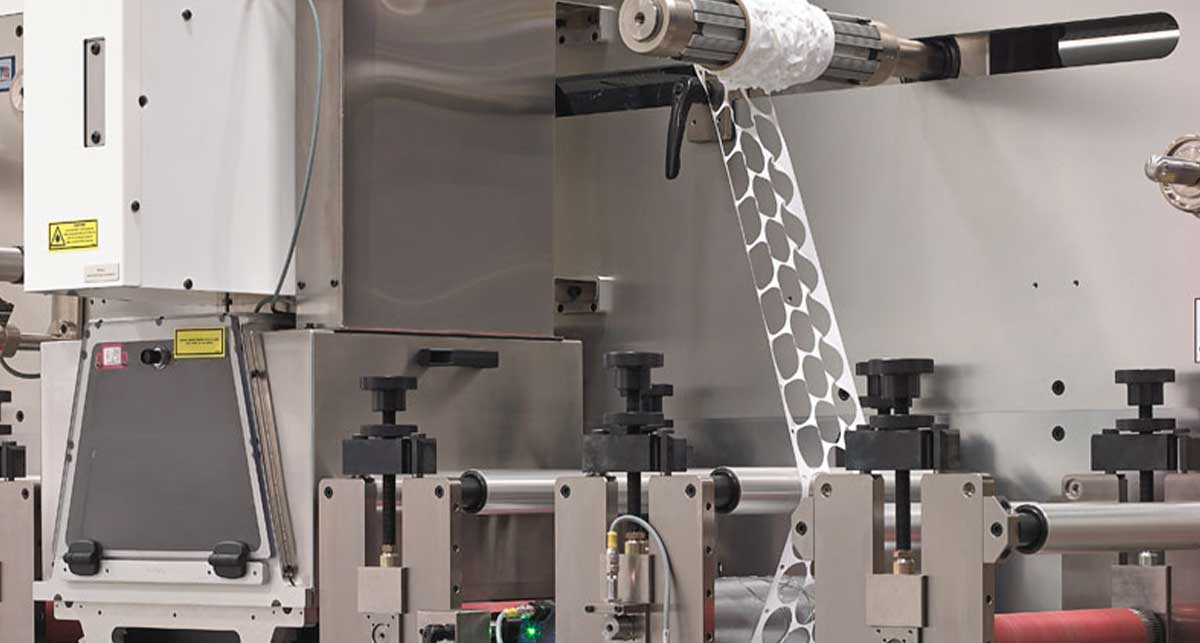
Die cut parts vary slightly on a rotary die cut press, so you’ll definitely want to include part tolerances to achieve accurate parts.
Flexible material converting results in parts with tiny disparities, but in many cases, a tenth of an inch difference could render the whole product unusable. Before you submit your drawing, ask yourself:
- Are my part tolerances intentional?
- How much do my tolerances matter?
People also often submit machine shop tolerances without realizing that converters operate by different standards.
Most drawings have a key for title block tolerances in the corner. Still, it’s worth confirming whether your part tolerances are necessary or leftover from a standard project template because achieving machine shop tolerances might be highly challenging and pricey for a flexible material converter. As your converter, we want to ensure that your part has functional tolerances.
Your converter will quote based on what your part needs to function. Tight tolerances can also impact our cutting method or increase the overall price exponentially, so you can save money by clarifying what you need instead of your tight, default title block tolerances.
3. FREQUENCY OF MEASUREMENT (IF NECESSARY)
Additional quality measurements aren’t necessary for every project. Still, if you plan on asking for them, you can add the frequency of the measurements to your drawing to ensure the converter accurately plans how to create your part.
Certain projects require a high-level inspection using precision cameras, and while possible, this could also change the setup of your press entirely. Changing the setup can be difficult because the number one priority is running the press consistently to avoid the added expense of slow run times or starting/stopping.
If you want measurements, your converter must know the frequency and measurements you need to plan an inspection process that can measure your parts while running smoothly and efficiently.
Other Information to Include in a Technical Drawing
You don’t necessarily have to write all this information on the drawing itself, but addressing these factors in some capacity when you submit your sketch will allow your converter to evaluate your part design better and improve the converting process.
Here is additional information that can improve your drawing’s quality:
a. Physical appearancePhysical appearance includes details such as the type of ink or material callouts, which can be vague, like “polyester” or a material ID number.
b. Material RequirementsSome projects specify a particular material without any substitutions, while others have a broader range of materials. Knowing this will help your converter understand the level of design flexibility when optimizing your product design.
c. Sterilization specificationsYou can elaborate on whether your converter needs to run your part in an ISO Cleanroom or a similar sterile environment to avoid biological contamination.
d. Packaging needsDoes your part need to be heat-sealed? Should we package it in rolls or box individual parts? Your packaging could be worth clarifying to ensure a thorough design process.
If you have notes to make about the physical appearance, material requirements, sterilization specifications, or packaging needs, consider adding them to your drawing.
Submitting a Part Drawing
Once you feel confident about your part drawing, you should get it evaluated and quoted by someone with the correct capabilities.

After you submit your part drawing to Strouse, our engineers will evaluate your design for its die cut feasibility and begin mapping out a potential process. We’ll likely ask many questions before sending samples or planning a meeting to discuss moving forward.
Evaluating your part will put you on the right path toward a successful product, but what if you’re not there yet? If you’re unsure about your drawing or don’t have one yet, check whether you’re ready to talk to an adhesive converter.
Lastly, don’t hesitate to ask us if you have any questions about your project or our process.